Sunday, March 24, 2013

Packing Tape Bookmarks

IMG_0298

These bookmarks are a fun way to bring Spring indoors and they are also easy to make, so it is a great craft to do with the kids. Just by using packing tape, you can make "laminated" bookmarks with shamrocks, grass, or flowers.

You will need:
Cardstock cut to size
Clear packing tape
Stamps/Stickers (optional)
Clover

IMG_0273

Decorate your bookmark using stamps or stickers. This is optional, but it's a fun way to personalize your bookmark.

IMG_0274

IMG_0275

IMG_0276

Once you've finished decorating the cardstock, prepare to "laminate" your bookmark with the packing tape. Place the clover in position on the cardstock. Pull the tape out, and then place over the bookmark.

IMG_0277

Once you've smoothed the tape over the cardstock, flip the bookmark over and fold the tape over the other side.

IMG_0278

If you press the tape around the clover and create an air-tight seal, the clover will stay green and remind you of Spring year round!

IMG_0279

Trim the bottom of the tape and around the edges of your bookmark.

IMG_0283

IMG_0285

These bookmarks are perfect for the Easter holiday coming up. Make some and tuck them in good books for your Easter baskets.

IMG_0292

IMG_0287

I made this four-leaf clover bookmark using this technique over 3 years ago, and it's still bright green! I like to think it's my lucky charm. Enjoy this fun and easy way to bring a little Spring into your day.

IMG_3573

Monday, March 18, 2013

Spring Hand Puppets

IMG_0152a
This project is simple, fast, and lots of fun! Using one pattern, you can make hand puppets for three different furry friends. Let's get started!

CHICK PUPPET 

1. Download the free pattern I created for the Spring hand puppets.

2. For the chick puppet you will need:
Yellow felt
Solid black animal safety eyes (can be found at any craft store)
Small piece of orange felt
Glue
Yellow thread & a needle
3. Using the chick pattern pieces, cut out the felt parts for the beak, head feathers, and body.

IMG_0074

4. Mark the place on the chick's face for the eyes.
5. Cut holes in the felt for the plastic safety eyes.
6. Insert the plastic eye.
7. Firmly secure the washer to the back of the plastic eye.
8. Repeat steps 5-7 for the next eye.
9. The beak is a square, but folded point to point, it is a triangle. Glue half of the beak to the face.
10. Fold beak.
11. Glue top feathers onto back of head.
12. Let dry!
chickpuppet

13. Once the glue is finished drying, pin the 2 body pieces together.
IMG_0133

14. With a running stitch (needle up through, needle down through, repeat) finish the sides of the chick to create your puppet. Leave the bottom open for your hand!
IMG_0138

Now you have a chick hand puppet for Spring! Follow similar steps to create the frog and bunny puppets!

IMG_0142 IMG_0153

FROG PUPPET 

1. Download the free pattern I created for the Spring hand puppets.

2. For the frog puppet you will need:
Two shades of green felt
Green animal safety eyes (can be found at any craft store)
Glue
Green thread & a needle
3. Using the frog pattern pieces, cut out the felt parts for the belly, nostrils, and body. Notice that the frog body has a heart shaped head, and not the rounded head like the chick and bunny.

IMG_0097

4. Mark the spot for the plastic safety eyes.
5. Insert the eye and secure the washer firmly on the back.
6. Insert next eye.
7. Put glue on frog nostril pieces.
8. Attach nostrils to frog face.
9. Add glue to frog belly.
10. Place belly on frog and let glue dry.
11. Stitch up sides of frog puppet with a running stitch.
12. You have a frog puppet now!
frogpuppet

IMG_0154


BUNNY PUPPET 

1. Download the free pattern I created for the Spring hand puppets.

2. For the bunny puppet you will need:
Pink and white felt
Solid black safety eyes (can be found at any craft store)
Glue
White and black threads & a needle
3. Using the bunny pattern pieces, cut out the felt parts for the ears, nose, and body. 

IMG_0110

4. Insert plastic safety eyes on bunny face.
5. Glue nose to face underneath eyes.
6. Glue pink inner ear pieces to white outer ear pieces.
7. Let glue dry.
8. Glue ears to back of bunny head.
9. Using the needle, sew a piece of thread through the bunny's face by the nose. 
10. Tie thread together on face.
11. Trim the bunny whiskers.
12. Make whiskers on other side of bunny nose.
bunnypuppet

13. Let bunny ears dry and then stitch up sides of bunny puppet with white thread. 
IMG_0155

These Spring hand puppets will make the best Easter basket stuffer! They are much more healthy than candy, and last longer too! (As a bonus, print out some Spring gift tags to hang from your Easter baskets!)

IMG_0171a

I hope that you enjoyed this craft! If you are local, you can watch me make these puppets on WDRB in the Morning this Wednesday morning, March 20, 2013. Julee from D.I.Y. Louisville will be on air too, making some cool Easter baskets. As always, if you miss it, you can check my facebook page for the online video.

Tuesday, March 12, 2013

Free Printable Spring Gift Tags

IMG_3598aa

It's Spring! Well... almost. I know I'm ready for the end of Winter. That's why I decided to make these cute gift tags for Spring. Put them on candy bags or Easter baskets; use them to write little notes or as bookmarks. Anything to add a little dose of color to your life as you prepare for Spring!

IMG_3590

To make gift tags:

1. Print the tags, cut them out, and round the corners (optional).

2. Punch a hole in the top of the tags.

3. Add some fun ribbon through the punched hole.

4. Write messages on the tags! collage gift tags
I hope you enjoy this free printable. You can see more of my printables here.

IMG_3602

Sunday, March 3, 2013

Etched Pilsner Glasses

IMG_3538a

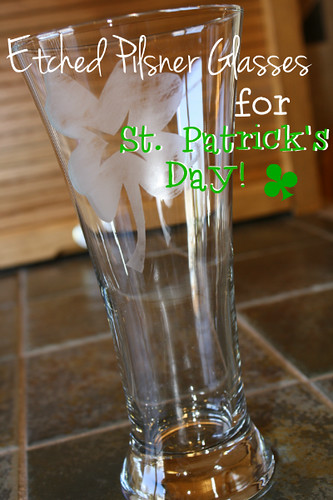
St. Patrick's Day is around the corner and what could be a better craft for the holiday but etched pilsner glasses? Using a few supplies you can personalize your own glasses at home. This process is called glass etching. It is very simple.
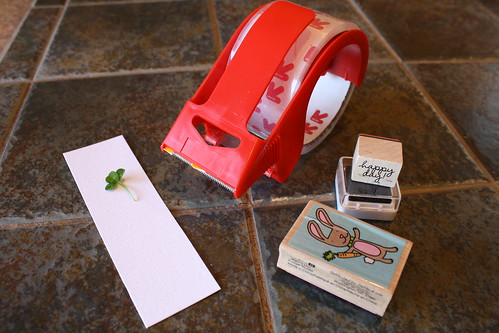
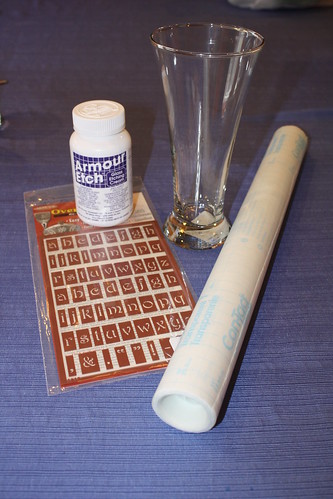
You will need:
Contact paper (to make your own stencils) or sticker stencils
Pilsner glass
Armour Etch or other etching cream
Paintbrush
Rubber/protective gloves

IMG_3488

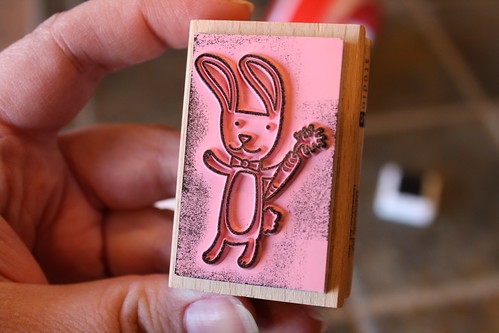
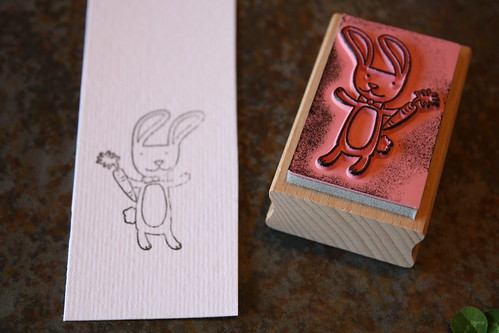
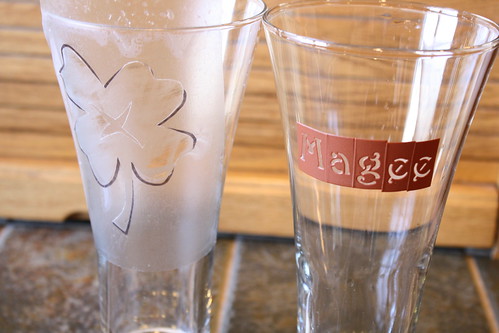
First you will draw your shape, like this shamrock onto the contact paper and cut it out. Peel off the backing and stick the stencil onto the glass. You can also use purchased stencils, like I did with the letters I used to spell "Magee" on the second glass. 

Put on the rubber gloves to protect your hands from the chemical etching cream. Using a paintbrush, cover the stencil with a generous amount of etching cream and let sit for 10 minutes.

After 10 minutes, rinse off the etching cream in the sink.

collage1
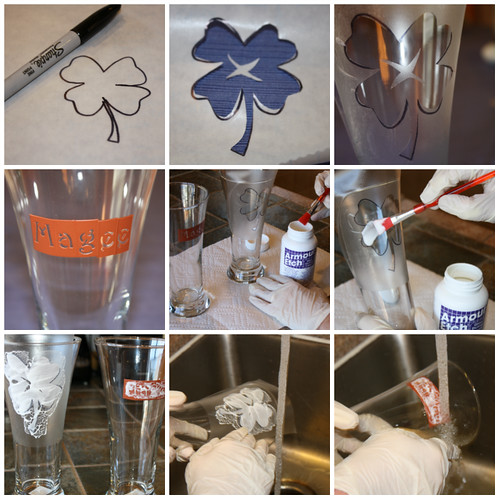
The next step is to peel off your stencils and wash your glasses with soap and water.

IMG_3530

They are now ready to be used! I etched these glasses with a shamrock and with my last name, but you can etch any glass with any design!

IMG_3531

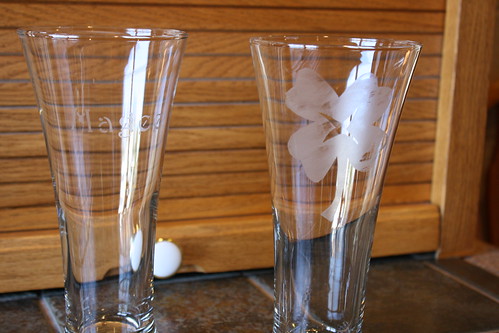
Happy St. Patrick's Day!

IMG_3538